Git repository integration
Each Y42 space is connected to a Git repository, enabling data pipelines to be stored and managed as code. This integration is crucial for ensuring that the logic and configurations of your data pipelines remain consistent, version-controlled, and easily collaborative across data teams.
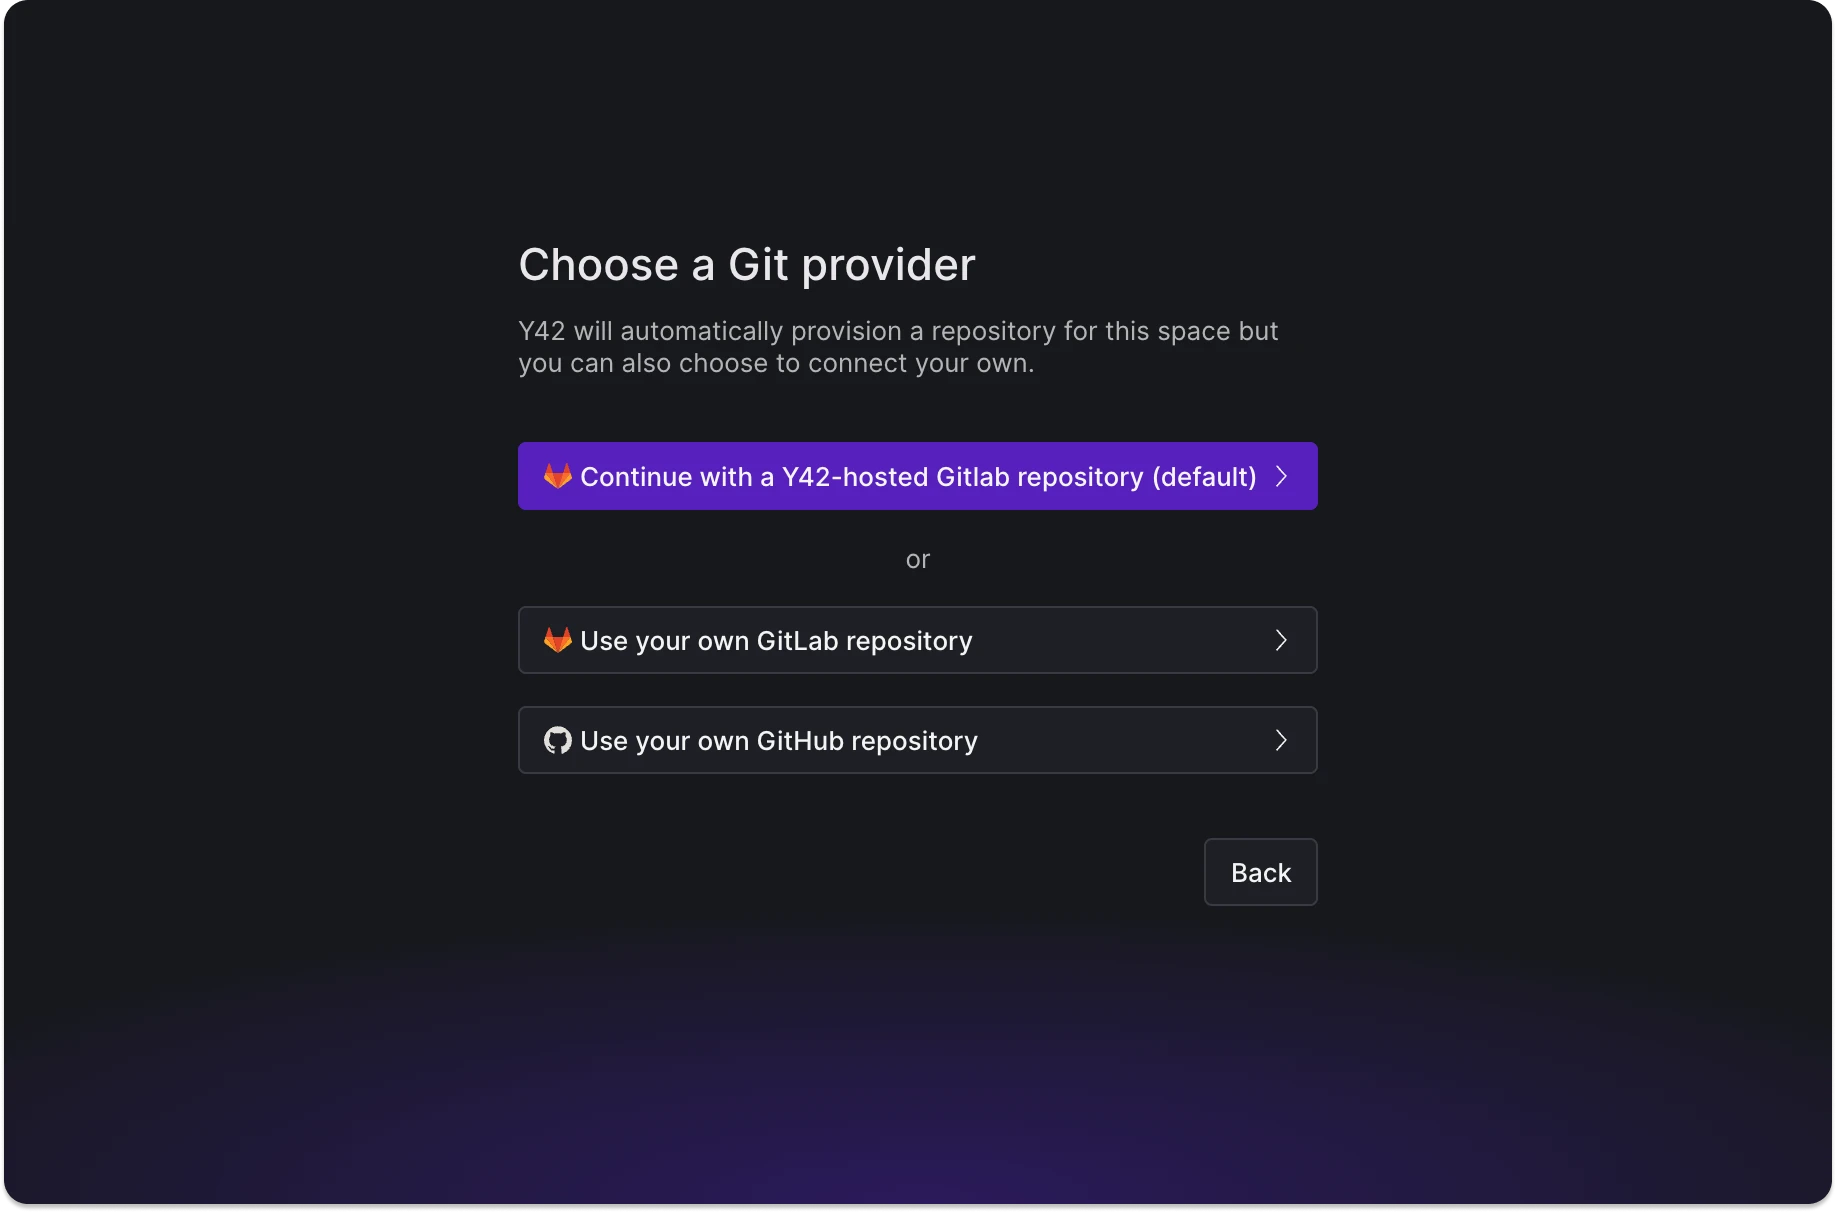
Connect your own repository to Y42.
Managing different environments
Y42's proprietary "Virtual Data Builds" feature leverages Git branches as distinct branch environments (e.g., development, staging, production), offering a powerful and flexible way to manage and deploy data pipelines across different stages of the development lifecycle.
Connect a Git repository
Y42 supports a single Git repository connection per Y42 space, focusing on maintaining a clear, manageable link between different versions of your data pipeline configurations and their respective branch environments. This design choice supports a streamlined management and deployment process for your data pipelines.
Supported Git providers
Y42 offers three options for setting up and configuring your Git repository integration:
- Default GitLab-hosted managed by Y42: Users can start quickly with a GitLab repository managed by Y42, offering full administrative permissions and flexibility to migrate to a self-hosted Git repository at any time.
- Own GitHub repository: For users who prefer GitHub, Y42 supports connections to repositories hosted by GitHub, providing flexibility and integration with existing GitHub workflows.
- Own GitLab repository: Similarly, users can connect their Y42 space to their GitLab repositories, allowing for seamless integration with GitLab’s features and services.
| Git provider | Reference |
|---|---|
| GitLab, managed by Y42 | Guide |
| Own GitHub | Guide |
| Own GitLab | Guide |
Swapping Git repositories
You may want to replace the Git repository associated to a space. You can do so by going in the Space settings > Integrations and clicking on the Swap repository button.
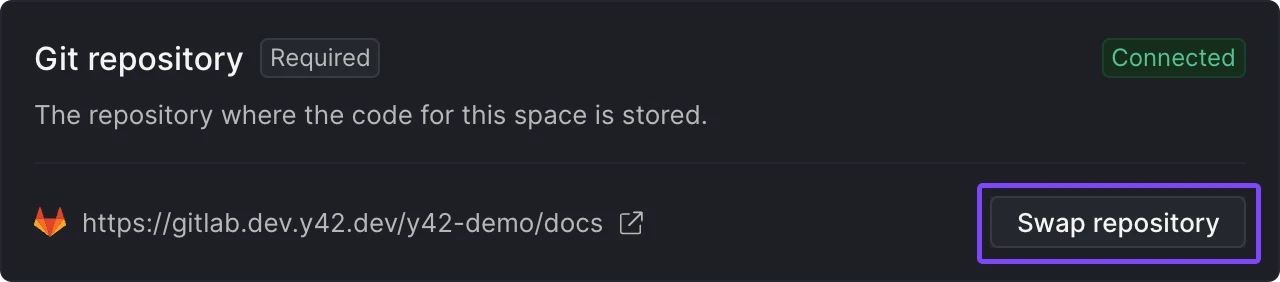
Swap git repository.
Swapping a repository involves the following steps:
- Selecting a Git provider and authenticating against it
- Choosing a new repository for your space
- Transferring the files of the default branch onto the new repository
Transferring space files
For the transfer of the spaces files to succeed, you will need to select a repository that:
- is empty(incl. being exempt of any initial commit / README)
- or allows force pushes
More informations about branch protection for GitHub (opens in a new tab) and GitLab (opens in a new tab).
In addition to authorising the repository, you will also be prompted to link your personal Git provider account for the push of the files to go through (as it relies on a git push operation).
Additional considerations
Should you decide to cancel the swapping procedure after authenticating against a different provider, you will need to re-authenticate back on the original Git provider of the space.