SAML
Set-up your SAML integration by providing the necessary input. Always refer to the respective SAML provider's set-up manual.
Copy necessary SAML fields from Y42
To set-up SSO via SAML, you need to copy several unique ids / url fields from Y42:
- Entity id
- ACS url
- Logout url

Set-Up SAML in Y42: Get SAML fields from Y42
Paste these values in the respective set-up fields in your SAML provider.
Paste necessary SAML field into Y42
In your SAML provider's set-up and configuration page, you will find the Metadata url field that you need to copy.
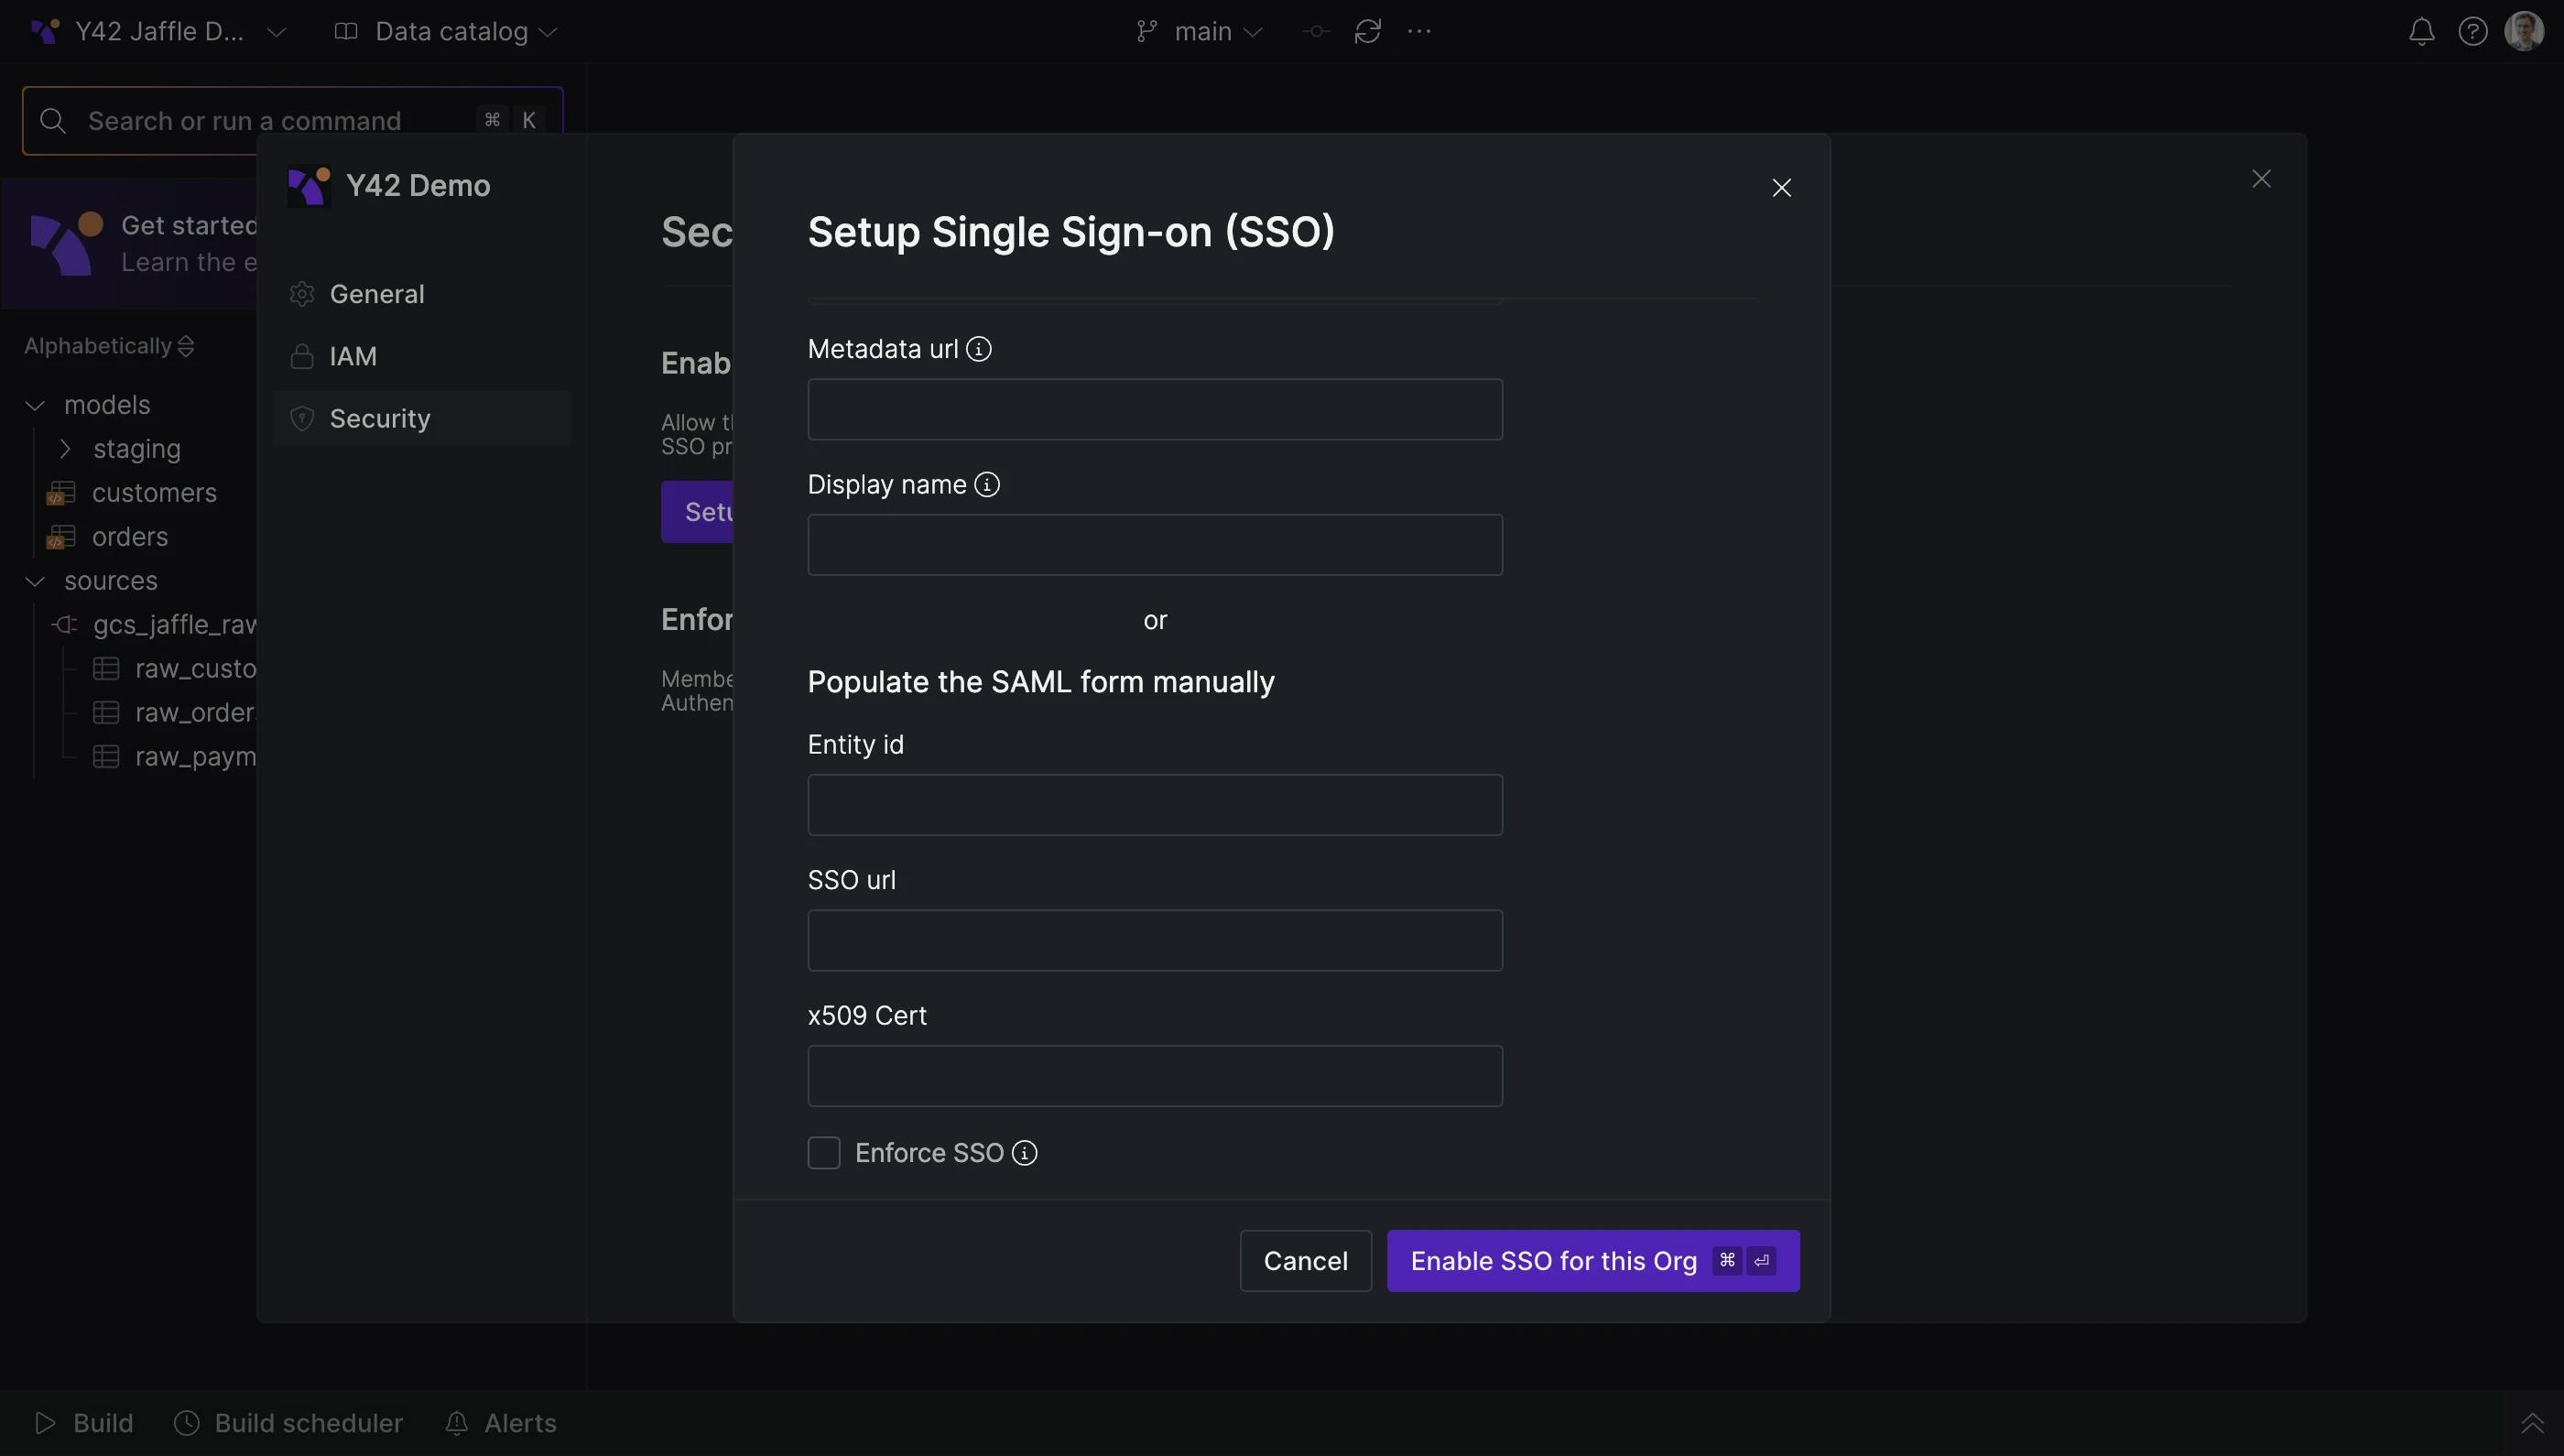
Set-Up SAML in Y42: Paste the SAML provider's SAML fields into Y42
Paste the value into the Metadata url field in the Y42 SAML set-up screen.
Complete Set-Up in Y42
Finally, provide a suitable Display name for this SSO method and click Enable SSO for this Org.
Manual set-up method
Depending on your SAML provider you might want or need to provide certain fields manually:
- Entity id
- SSO url
- x509 Cert
Refer to this alternative set-up method if the above SAML set-up method doesn't succeed.