
If you recently migrated to Snowflake, you might be looking to get the most out of your new data warehouse. A driving force behind Snowflake’s success is its ecosystem of partners. You can pick and choose the extensions that best fit your needs, thus speeding up data engineering compared to “vanilla” Snowflake.
The first area to look for quick wins is likely the T in ELT: Transformation. Or, more accurately on Snowflake: ELT. Data transformation happens primarily within the data warehouse, so we want to work with tools that work well together with Snowflake. One broadly adopted tool is dbt, or data build tool.
If you would like to learn more about the benefits of dbt, you can read my previous post here. If you’re instead looking for a quick dbt Snowflake tutorial, look no further!
In this post, I’ll walk you through configuring dbt core on your local machine to work with your Snowflake database. I’ll also briefly discuss the limitations of this setup – and why a central orchestrator is preferable.
How to configure dbt on Snowflake
To follow along, you’ll need to have the following up-and-running:
- Git installed
- Python and pip installed
- A configured Snowflake account with permissions to create databases and warehouses
This guide presumes that you work on a Unix-like system (Linux or MacOS) but should work on Windows too with minor modifications.
1. Create a new Snowflake database
Let’s start our dbt Snowflake journey by creating a new database and warehouse. In the Snowflake UI, open up a new SQL worksheet and run the following commands:
-- Set up variables
SET DATABASE_NAME = UPPER('DBT_SNOWFLAKE_DEMO');
SET DATABASE_COMMENT = 'Database for a dbt demo project';

SET WAREHOUSE_NAME = UPPER('DBT_SNOWFLAKE_DEMO');
SET WAREHOUSE_COMMENT = 'Warehouse for a dbt demo project';

-- Your current role will get access to the database we create here
SET EXECUTING_ROLE = CURRENT_ROLE();

-- Set up database
CREATE DATABASE IDENTIFIER($DATABASE_NAME) COMMENT = $DATABASE_COMMENT;
GRANT ALL ON DATABASE IDENTIFIER($DATABASE_NAME) TO ROLE IDENTIFIER($EXECUTING_ROLE);

-- Set up warehouse
CREATE WAREHOUSE IDENTIFIER($WAREHOUSE_NAME) COMMENT = $WAREHOUSE_COMMENT WAREHOUSE_SIZE = 'X-Small' AUTO_RESUME = true AUTO_SUSPEND = 60 WAREHOUSE_TYPE = 'STANDARD';
GRANT USAGE ON WAREHOUSE IDENTIFIER($WAREHOUSE_NAME) TO ROLE IDENTIFIER($EXECUTING_ROLE);
2. Find Snowflake account identifier
dbt will need your account identifier to connect to the database. Run the following command to retrieve your Snowflake account identifier:
SELECT CONCAT_WS('.', CURRENT_ACCOUNT(), REPLACE(REGEXP_REPLACE(CURRENT_REGION(), '^[^_]+_',''), '_', '-')); -- e.g.: `YY00042.EU-CENTRAL-1`
Or hover over your profile icon in the bottom-left corner, then hover over your account, hover over your account again, and click 🔗 Copy Account URL.
Copy and paste the value to a place where you can easily find it later.
3. Install dbt
Now, it’s time to move to your local machine. As with any dbt tutorial, you’ll need a dbt project to work in. Create a new repository and give it a sensible name like dbt-snowflake. If you created the repo online, clone it to your local machine and navigate to the dbt-snowflake directory. Here you can create a new virtual environment:
python -m venv .venv
source .venv/bin/activate
Now you can install the dbt Snowflake package with pip:
pip install dbt-snowflake
4. Set up dbt and connect to Snowflake
In your dbt-snowflake directory, run dbt init to create a new dbt project. Provide a sensible name, such as dbt_snowflake_demo, and select [1] snowflake to set up your profile. Next, enter the Snowflake account identifier you retrieved earlier.
Enter your username (e.g., ROB.DEWIT@Y42.COM) to connect with your Snowflake database. From here on out, the setup varies slightly depending on how you configured your account. You can authenticate in three different ways:
- With a password
- With a keypair
- With SSO
Select the option that works for your account, and provide the relevant details. In the next step, enter the role you want to use when connecting to Snowflake. If you are unsure which role you should provide, you can run SELECT CURRENT_ROLE(); to find the role you are currently using – and presumably used when creating the database and warehouse.
After entering your role name, provide the warehouse and database names you configured earlier. For the schema name, you can once again pick any sensible name (such as DBT_SNOWFLAKE_DEMO).
Finally, select the number of threads you would like dbt to use. Especially when starting out, I recommend sticking to 1.
You can verify your dbt profile configuration with cat ~/.dbt/profiles.yml. It should look something like this:
dbt_snowflake_demo:
  outputs:
    dev:
      account: YY00042
      authenticator: externalbrowser
      database: DBT_SNOWFLAKE_DEMO
      role: Y42_DEVELOPER
      schema: DBT_SNOWFLAKE_DEMO
      threads: 1
      type: snowflake
      user: ROB.DEWIT@Y42.COM
      warehouse: DBT_SNOWFLAKE_DEMO
  target: dev
Navigate to the newly created project directory (cd dbt_snowflake_demo) and execute dbt debug to verify your connection to Snowflake.
5. dbt run
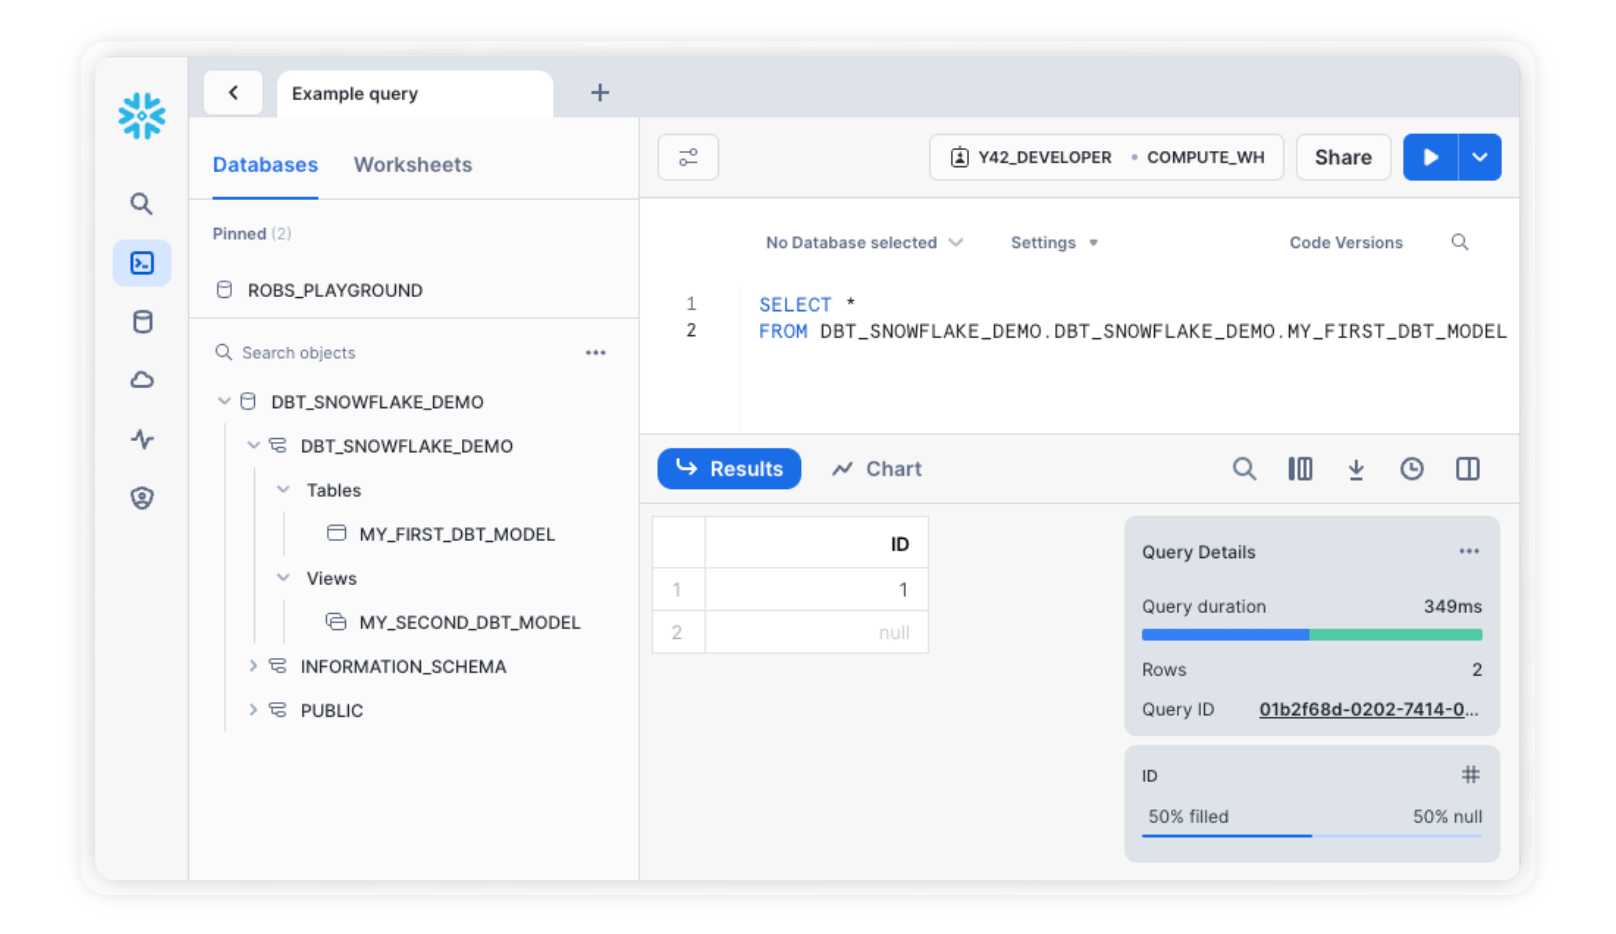
With the connection to Snowflake up and running, you can now trigger your first pipeline run. The default dbt project should have two sequential models out-of-the-box, which you can build by executing dbt run.
Depending on the authentication method you selected, you may be prompted to log in. After doing so, Snowflake will spin up your warehouse and build the models. When you now navigate to your database in Snowflake, your dbt models should show up!
Conclusions
You now have dbt up and running on your machine, and dbt can connect to Snowflake to access data and execute queries. This is a valuable addition to your Snowflake setup and should simplify your data transformation work.
That said, there is a downside to this setup that you may run into sooner rather than later. Because dbt runs on your local machine, you orchestrate pipeline executions locally as well. When collaborating with team mates on the same project, your dbt runs may interfere with one another. You will also need to ensure that your code versions are kept in sync.
The next step: a central orchestrator
If you would like to improve your development setup, you should consider a central orchestrator. It provides a single source of truth for your configuration, and a central point from which you can execute pipeline runs. You’ll find that this greatly boosts your team’s productivity.
The necessary extra configuration may seem a bit daunting, however. One of Snowflake’s core strengths is that it’s easy to set up and maintain. Why would you want to sabotage that by introducing extra complex infrastructure?
Luckily, there’s a turnkey solution that provides orchestration without hassle. We built Y42 to help you maximize data engineering impact, without needing three extra data platform engineers. Your entire team can work on dbt projects in a collaborative IDE, and plugging it into Snowflake is a 10-minute process. What's more, Y42 doesn’t just provide this environment for data transformation: it also handles your data ingestion, pipeline monitoring, and data governance.
If you would like to learn how Y42 helps you streamline data transformation on Snowflake, feel free to contact us and request a demo.
Category
In this article
Share this article
